Cennamo Woodwinds
  • Home
  • About
  • Services
  • Rates
  • Reviews
  • Gallery
  • For Sale
  • Blog
  • Contact Us
  • Buescher 400
  • Tune-Ups
  • Repads
  • Overhauls
  • Full Mechanical Rebuilds

August 14th, 2016

14/8/2016

1 Comment

 
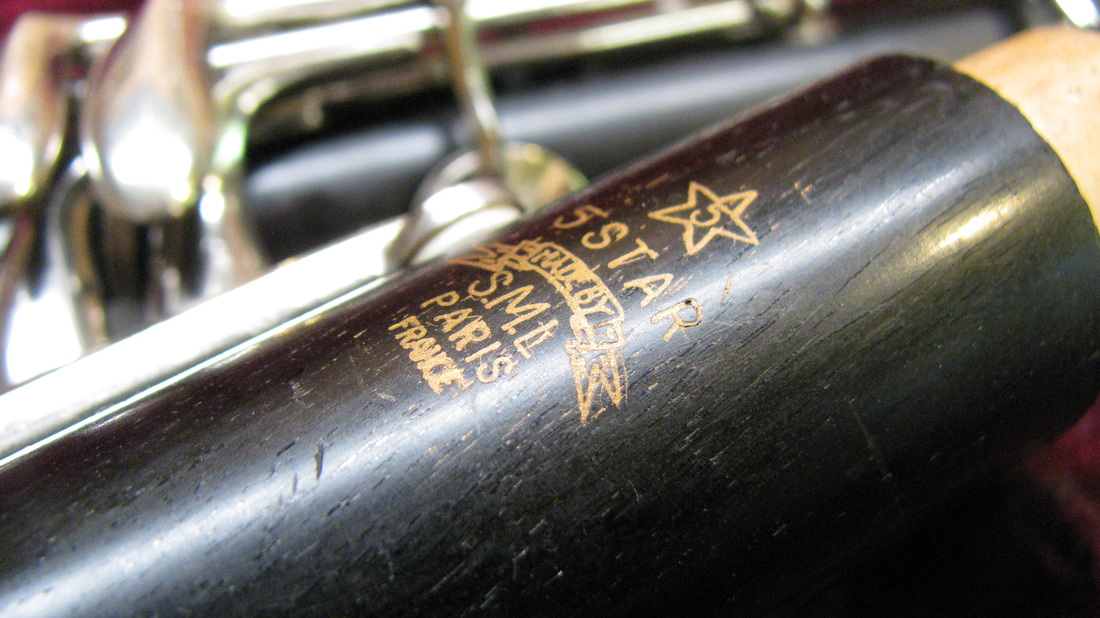
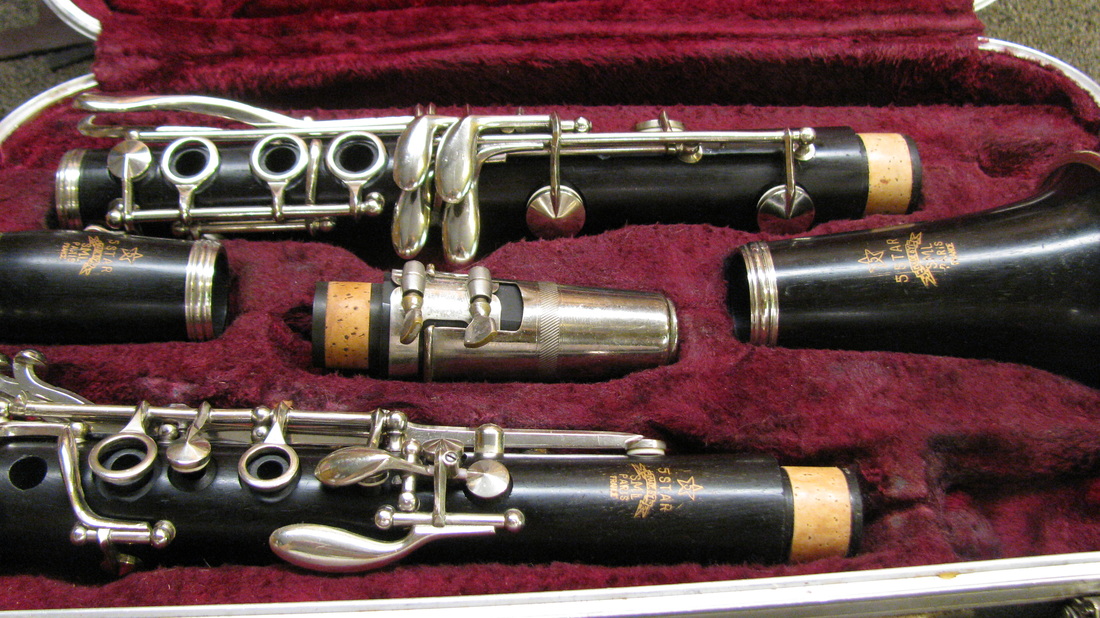
SML Five Star Soprano Clarinet
This right here is the winner. Without equivocation I can say that this is the best professional clarinet I have ever overhauled or played. The enormity of the tone, the immediacy of the response, the free blowing feel are all leagues beyond anything else I have experienced. Many of you know that I a partial to SML's, so you would not be remiss to think I am biased, however, I have no investment in inflating the reputation of SML, I am simply stating my emotional response to playing this horn after the Full Mechanical Overhaul. Sometimes after an overhaul you have to do quite a bit of fine detailing to get everything out of the instrument that you believe is there. It's a normal and important part of the process. But there are other times when the playtest is over in seconds. Just like when you find a mouthpiece you know is perfect; it takes seconds. I actually cussed after blowing this horn for under minute. The intonation is spot on throughout. The throat tones are full, especially the notorious Bb. The tone is so beautiful. Man, SML did it again. I mean, I didn't even have to make any adjustments to the left hand spatulas, they are perfect. That has never happened. I love you SML.
See a the whole slide show here.

1 Comment

July 14th, 2016

14/7/2016

2 Comments

 
100 Year Old Buescher Tru Tone Soprano
This is the oldest horn I have yet to restore, a 1917 Buescher Soprano,  and it put to rest many of the claims I have heard about vintage saxophones from the teens of the 20th Century. Most of those claims are that these "Pre-Snap" Bueschers just don't play right, or that horns from before 1920 have terrible intonation and are not worth any investment. The funny thing about such claims is that when I first started out as a repairman, I was told to dissuade people from investing in any horns that were made before 1925; The claim being that it wasn't until about that time, or even later in most cases, that saxophones were truly being made well. The inherent intonation issues were so prevalent and so difficult to overcome that overhauling horns from that era was fool hardy. However, after restoring several pre-1925 horns from several manufacturers which all played remarkably well, I had to change my mind about these claims....see the rest here.
2 Comments

June 10th, 2016

10/6/2016

1 Comment

 
1952 Conn 12M Bari Huge Overhaul
"Carlo, thank you so much for the top notch overhaul of my '52 12M. I know it was a bit of a bear to work on because of all the abuse it has seen. The effort was worth it. It plays like velvet. As a sax geek I so appreciate all your attention to even the most minute details. And I'm glad you recommended we strip the lacquer. Playing a decent looking horn won't make me a better player but it sure feels nicer to just have it in my hands.
Owning a great playing bari has literally been a 10 year journey for me. From the Martin being stolen/recovered to its horrible, dishonorable overhaul, and its eventual trade for the battered 12M. I am so happy with this horn now. Please understand that every little thing you did to make it better is noticed and appreciated. Hooray!"
See the full slideshow here.
1 Comment

May 18th, 2016

18/5/2016

0 Comments

 
Were Your Tone Holes Chamfered? What Is it? Why do You Do It?
These photos show tone holes on a Conn 12M. In the left column the tone holes a have not been chamfered, while on the right they have been.
This horn was overhauled several years ago, but lots of necessary mechanical work was neglected, so it is now in my saxophone repair shop in Seattle. The tone holes were filed during the previous overhaul. Some of them are even level, but none of them were chamfered. Any facing of a tone hole will leave an edge; a burr. The burr must be removed. The burrs can actually tear a pad, although it is rare, but they often grab the pad interfering with its stroke, and if you think you have seen really stick pads, just think how bad it is when there are sharp edges on either side of the tone hole rim. It's terrible.
Tell tale signs of proper chamfering will be on the outside rim of the tone hole, as seen in the top row here.
It does fade, so, if your horn was overhauled some time ago, the mark may be gone.
0 Comments

May 11th, 2016

11/5/2016

0 Comments

 
                                                               Up Coming Overhauls
A 1941 Conn 30M Connquerer. A 1917 Buescher Tru Tone Soprano keyed only to high Eb made before Buescher designed the Snaps. And a 1949 Buescher Big B Aristocrat Tenor.
Picture
0 Comments

May 11th, 2016

11/5/2016

0 Comments

 
                                     Structural Breaks Should Always Be Silver Soldered.
Call me picky, but I resoldered this D palm key touch piece because it had been soft soldered. Silver solder is far stronger than soft solder because the alloys are heated to above 800 degrees, and at this liquidus temperature, the molten filler metal interacts with a thin layer of the base metal, cooling to form an exceptionally strong, sealed joint due to grain structure interaction. The silver brazed joint becomes a sandwich of different layers, each metallurgically linked to each other.
And it looks way better when it is done cleanly.
This is part of a Full Mechanical Overhaul on a '73 Mark VI. I could have left this key the way it was. It did function after all. But that is why I say, "call me picky."
0 Comments

March 21st, 2016

21/3/2016

0 Comments

 
Positioning Adjustable F#/G# Regulation Arm For Mechanical Advantage.
Compare the two photos here. On the left is the standard back to front positioning of the F#/G# adjustment arm on Selmer style systems. The arm is almost always as far forward as it can be in the slot on the F# key. On the right I have set it back for mechanical advantage.
In the picture on the left the G# adjustment screw has to hold down the G# key as close to the G# fulcrum as it can be. Meaning, in the back of the G# key cup. That gives the F# key, and its adjustment arm, the least mechanical advantage available.
This is why door handles are positioned opposite the hinge side of the door. Imagine closing a door, but the handle is on the same side as the hinge.
When possible, as on Full Mechanical Overhauls or extensive Play Condition repairs on horns with this Selmer style system, I always reset the position of this arm so the adjustment screw is as far to the front of the G# key cup as possible. In other words, as far back in the slot on the F# key as possible.
If the adjustment screw is too close to the fulcrum, the G# key will sometimes flex when the left hand table is stroked. It will do this in spite of an otherwise perfect set up. This will create unusual and intermittent playability issues. At the least it will manifest itself as a hissing. At worst the horn will fail from C# - Bb.
The problem however is that this will happen even when the pad seats look perfect, and the G# key will show no light coming through during the mechanical test to check F#-G# regulation. It is this flexing that causes the leak. And moving the adjustment arm to the back of the F# key solves that problem. A common, and incorrect, solution is to over-regulate the F#-G# adjustment so the G# key is forced close out of necessity to close the F# key. No, no, no.
0 Comments

February 06th, 2016

6/2/2016

1 Comment

 
Attention To Detail
Here's what Brian of Getasax said after receiving this horn that was overhauled by me in my Seattle Saxophone Repair Shop:
   "Hi Carlo, I got the Selmer Super Sax Alto that you overhauled today. Well, I already suspected as much, but based on this horn, I think your pad work is among the best to be found anywhere today. (And in my job, I get to see a lot of different people's pad work.) Extremely even, flat, snappy, just the right amount of spring tension, even across the horn, adjustment materials make sense and are nice and clean. And it looks like you did a real neck fit too, which is super-important but often-overlooked. I am going to start referring people to you who are looking for top quality overhauls. This is the real deal! I hope I can send you some horns for overhaul soon, before too many people find out about you and you end up with a long wait list."
Thanks Brian. I'm super glad you're happy with the work!    See the whole gallery here.
Picture
1 Comment

November 23rd, 2015

23/11/2015

0 Comments

 
A Night Poem
Late November 7th I was in the shop and wanted accompaniment to my improvising, so I put on some old French poetry. Sometimes there's more to improvise along with a backdrop.
This sounds much better on a little tinny speaker. Bass heavy speakers make it sound all muddy.
0 Comments

November 10th, 2015

10/11/2015

0 Comments

 
                                                                       Ye Olde Shoppe
Here is what the shop sometimes sounds like late at night. Not working on horns. Just playing the piano.
This bit is rather nice, but a long, disjointed melody over it would be even nicer. Maybe tenor, but it'd have to be all up in the high register.
0 Comments

November 02nd, 2015

2/11/2015

0 Comments

 
            Dear Hobbyists, Please Stop Misinforming People and Wasting Their Time
This 1948 10M came into my saxophone repair shop in Seattle and the owner is experiencing intonation issues and intermittent playability problems.
Although the horn was "overhauled", it was overhauled by someone that made absolutely no attempt to do the job properly. But they did buy the most expensive pads on the market to do the job. Why? Presumably because it made the horn easier to sell. But so what? Not a single key on the horn was refit. Not only are the keys loose, not one rod fits inside its post correctly; there is concentric play inside every post. The first two photos below show the F key in the lower stack and you can see just how much slop is between it and the F# key next to it. Every single key on the horn is like that. It's a mess, and it's a shame.
So why does this matter? Do loose keys cause intonation issues?
Not directly. But loose keys are at the root of the problem.
Loose keys wander all over the place. The concentric play on the rod causes key deflection, and they ruin properly seated pads by blurring an otherwise well-defined pad seat. And that causes both intonation and playability issues.
Know what else cause intonation issues? Improperly vented keys. The lower stack was significantly over-vented. That means the keys were too high. This can throw the octaves way off and playing in tune with an ensemble is virtually impossible.
Let's look at the pad work. You want to show off your super expensive pads, right? Well, Roo pads have very thick skins and require a deeper seat than tanned kid leather. These pads had seats that were too shallow, and shallow seats in Roo pads never hold. And, due to their extra firm felt, if the tone holes are not level, you will never get a proper seat in a Roo pad. And none of the tone holes are level. None of them.
Look at the first two pictures below. They show the front and back of the G# tone hole respectively. See the light? There are low spots in the front and back. And guess what? There was a significant leak in the front of the G# pad. The third picture shows the low D tone hole. See that depression? The pad was, not surprisingly, leaking significantly. You'd need very good luck to seat a pad on that tone hole.
And the last picture shows a loose spring. It's falling out of the post, and there were others like it. The only thing keeping it in place was the tension put on the spring by the cradle. It's like a loose wood screw held in place because the canted angle won't allow the screw to fall. And loose springs feel mushy, they don't provide a positive snappy action.
Let's see what we have here: Sloppy unfit key work. Sloppy wobbling rods. Loose Springs. Out-of-level tone holes. Poorly seated pads. Improper venting. A horn that responds poorly, intonates unevenly, and has intermittent playability issues.
Why do I say hobbyist repair techs are misinforming people and wasting their time?
Because the unsuspecting people that buy horns like this think they have a horn that was "overhauled", and they rightly assume the horn shouldn't have too many issues. They also assume that any issues it does have won't require extensive repair. Doing repairs like this lowers the bar on what passes for a proper overhaul and gives professional repair techs everywhere a bad reputation. And it leads many people to believe overhauls can be done cheaply, but it just wastes their money. And educating people why their horn is in need of such extensive repair without injuring their pride or bad mouthing another "repair tech" is a diplomatic art at which I have become very articulate.
There is no shortage of excuses for why corners are cut on jobs like this, and they include: insufficient compensation, lack of proper tooling, lack of education, lack of skill, lack of time. But none of that matters. This recently overhauled horn needs an overhaul and that is an inexcusable waste of time.
A new, full set of pads indicates this person intended to "overhaul" this horn, not just tune it up or whatever. Fine, do it to your own horn. Do not sell the horn and misinform people everywhere. If you do sell it, clearly stating what was not done would help saxophone enthusiasts everywhere.
Thank you.

0 Comments

September 22nd, 2015

22/9/2015

0 Comments

 
Key Work Geometry
As usual, the best work is in the small details. Here is the left hand table on a Super Action 80 II I just overhauled in my saxophone repair shop here in Seattle. As you can see, the Bb mechanism in the first photo is level with the table. Repair techs worth their salt everywhere are always going on about "leveling the left hand table." And they're right. The table must be level to facilitate navigating the the three lowest notes on your horn. But in this Selmer design the Bb needs to be tilted.
When it's not, its stroke bottoms out at an angle too great in relation to the B and C# spatulas. This makes navigating the table impossible without awkward extensions of the little finger. If you pick the Bb spatula up, as it is in the image on the right, you decrease the final angle: Follow the stroke in your mind; Remember, we're not changing the height of the Bb key cup, so the pad cup strokes the same distance, but will now bottom out at a smaller angle in relation to the B and C# spatulas. Reducing that angle reduces the work of the little finger which facilitates a quicker, snappier, and far more comfortable action.
​ As with all fine saxophone repair and adjustments, there is a balance; If you go too far with this adjustment, it makes getting from C# to Bb very cumbersome.
0 Comments

September 10th, 2015

10/9/2015

3 Comments

 
                                                    Trying Something New: Graphite
     I often embed G# pads with Teflon powder. I posted about it a couple weeks ago. I stated in that post that the jury was still out on that practice. Here is an alternative. Graphite.
     This is the G# pad to a Super Action 80 Series II that's in my saxophone repair shop in Seattle for a Full Mechanical Overhaul. The second photo compares a treated pad on the left with a plain one on the right. We all know Roo pads stick. Every repair tech worth their salt has seen an unresponsive G# key with a Roo pad in it sticking to the tone hole. So let's see how this works out.
3 Comments

September 01st, 2015

1/9/2015

1 Comment

 
                                    Customer Review of The SML Gold Medal II Stencil
      I got this phone call from the owner of the SML Gold Medal II Stencil. He loves it! Hearing feedback like this is what makes the attention to detail all worth it.  You can see the whole gallery here.
                                     
1 Comment

August 25th, 2015

25/8/2015

0 Comments

 
Hinge Tube Extensions? Isn't All That Work Unnecessary?
The short answer is No. Here you see a 1941 Conn 10M owned by a client from Los Angeles. The Octave key is sitting between its posts. Look at the gap. It's not small by any means. It's huge. The key is wobbling like crazy on the hinge rod and will wander between the posts. This will give the octave pad multiple seats and ultimately end up in the key dragging against the guide. True, the key will err to one side over the other, but is that how you like you key work? More or less in one position when its not in some other?
     "Sounds good to me. I prefer there to be over lapping seats in my pads. And come to think of it, I like all that clicking and clacking too, so keep those keys loose", said No One, Ever.
      The gap here is so large it can not be corrected with normal key fitting, nor is it wise to simply bend the posts in towards each other. Doing so might give the appearance of a good fit, but the posts will be angled inwards causing the key to drag. When the whole Octave assembly doesn't feel heavy, sluggish, and unresponsive, it'll fail intermittently. And considering the distance needed to be covered, angling them will probably put dents under the posts as well.
    That is why hinge tube extensions are necessary. They are not overkill. Making this bushing, soldering it onto the hinge tube, and fitting the key so the faces of both the hinge tube and the posts are square, allows the key to stroke positively. Now there is absolutely no concentric play on the hinge rod, end play between the posts, or slop within the hinge rod and its post.
     It is a repair that will last for years, and that is how I do things in my saxophone repair shop here in Seattle. It takes longer and costs more, but unlike the above mentioned alternatives, it eliminates frequent visits to the shop. And frequent visits to the shop are what is really unnecessary.
0 Comments

August 20th, 2015

20/8/2015

0 Comments

 
                                                  The Little Stuff Makes A Big Difference
       This 1941 Conn 10M is in my woodwind repair shop in Seattle. The previous repair tech crunched the tabs on both the side Bb and C keys. Why? To eliminate lost motion between the the lever and the key. Lost motion is when a lever or key designed to open or close another key does not do so instantaneously: The keys should act as one.
     When there is lost motion they feel clumsy, clunky, and reduce the players confidence in their horn. If the adjustment materials are too thick, or create unnecessary friction, the key will bind. If the adjustment materials are too hard, the key work will make annoying clicking sounds. If the materials are the correct thickness, act as good bearing surfaces, and are soft enough to absorb sound, the key work will act as one, feel slick and responsive, and be silent.
       Here is a short chronology: Lost motion is usually the first indication that your adjustment materials have compressed and worn down over time. Your horn will often play adequately even if there is lost motion. It will just feel clunky, but when the discrepancies increase, playability issues will surface, and that's when you end up in the repair shop.
     So, how to get rid of it? You could do what was done in these photos. Just crunch those tabs to make up for the worn out adjustment material and send the musician on their way. This could result in:
-Obviously unparallel key tabs which are ugly as hell and look like someone didn't care enough to do the job right.
-Compressed height adjustment material under your Bb key. Which is unsightly and will increase the key stroke, producing a sharper Bb. It will also make the key bind before it bottoms out on the body tube.
 -Plier marks on your Bb key.
     Look at the two pictures above. The angled tab on the Bb key even wore down the lever. It has a taper on its south side. Compare it with the picture below: That is a 1947 10M. See the corners on that lever? That is how it should look.
Picture
      Setting the adjustment materials so they eliminate all lost motion and silence all the key work is time consuming. When I worked in a corporate repair shop, taking the time to do it the way I have done here is exactly the kind of thing that would have resulted in a Repair Department Meeting in which we would all be pressed to get work done faster. This is why repair techs do what was done in the first photo. They are either pressed to do so, or they have been trained to do so and don't know any better.
    Of course, sometimes, the client has made their inability to pay for a proper repair clear and has been told explicitly by the repair tech that corners will be cut. But that topic requires a lengthy article all to itself.
0 Comments

August 11th, 2015

12/8/2015

1 Comment

 
                                                    1941 Conn 10M. Factory Relacquer?
When I see Res-O-Pads such as these, they say, "Original pads" to me. As in, these were the only pads put in this horn. But the bell has that relacquered look to it. Not so much in the engraving, but particularly in what looks like hammer marks near the bell-to-bow ferrule.
So, if it is a relacquer, at what point in this horns life, starting in 1941, did someone decide, or get persuaded, to have it relacquered at the factory? Ten years, in 1951? Eighteen, in 1959 right before they busted the union? I would love to go back in time and hear the sales person at the music store, or the repair tech in their shop, discuss the advantages of having this done.
1 Comment

August 06th, 2015

6/8/2015

1 Comment

 
Picture
                                        G# Pad Embedded with Polytetrafluoroethylene Powder
Doing saxophone repair in my Seattle shop for several years, I've been trying this out for sometime now and have not yet seen any horns come back. So, while the verdict is still out on the effectiveness of this, I like the theory enough to continue doing it. That the horns have not yet come back is, perhaps, confirmation that it's providing relief from sticking G# and C# pads.
Polytetrafluoroethylene is just the chemists name for Teflon. Rubbing the powder into the grain before ironing and seating the pad gives the result you see in the photo.
1 Comment

May 16th, 2015

16/5/2015

1 Comment

 
"This Horn Has Just Been Serviced. In Perfect Condition. Amazing!"
You'll see these statements on just about every listing on the internet. What, you may ask, does this vague term "Serviced" mean? The answer is a long one, and it'd be impossible to get two repair techs to agree on what a properly serviced instrument is or what is done when an instrument is serviced.
     The short answer throws around some more dangerously convenient terms. A "Serviced" horn is one that has been "Tuned-Up," put into "Playing Condition," has been "Cleaned, Oiled, and Adjusted," "Gone Over," "Checked Out," or "Repaired".
All of these terms are equally vague and open to wildly debated definitions. One repair tech's approach to these jobs is wholly different from another, and not every tech has the same level of scrutiny.
Picture
I have many clients in my saxophone repair shop here in Seattle with horns they have just purchased. Horns that were "Serviced." And they have: Failing adjustment materials, verdigris on the pads, rattling key work, keys with drag, action that is not balanced, necks that do not fit the receiver, neck tenons that are bleached and corroded, torn pads, incorrectly regulated octave mechanisms, keys that are not vented properly, and numerous leaks. And, they do not play.
There are two unshakable facts here: These horns have been "Serviced." And, they are unplayable. 
Someone did in fact "Go Over" these horns. But their level of scrutiny is such that the horn does not work when they are finished. Perhaps the client refused to pay for the amount of work needed to make the horn playable, which implies the tech let the horn leave their shop in the state in which I found it on my bench. Or, the horns have been deemed playable by the seller, because they sound like saxophones when they blow on them.
Picture
Either way, determining what happen is not only impossible but unimportant. We are picking up the story when the horn reaches my bench. And it is a sad, frustrating story. If I, the owner of a one man repair shop, "serviced" your horn and it had any of the above issues, how many jobs would I have to do before word got around that I did not in fact know how to do my job? Not many. I'd be without work right quick. But there is no shortage of horns being bought and sold that have been serviced incorrectly, and do not play. Why is that?
Ebay and Craigslist are real market places full of people that want to sell a horn as quickly as possible, and others that badly wish to buy a horn as inexpensively as they can.
They cross their fingers and buy blindly without counsel. I hear this in my shop a lot:
"I thought it might need some work, but I was hoping it wouldn't need an overhaul." I even had a client say, "I can deal with the noisy uneven key work, it's just the leaks that are really bothering me." Well, unless you see some excellent close ups of the pad work, and reference to a website naming the tech that did the work, who will proudly stand behind their services, either don't buy it, or ignore all descriptions of the condition of the horn and assume it will need a Full Mechanical Overhaul starting at $1600.
Picture
The picture above shows the low B pad on a horn that was listed as being in "excellent playing condition" and had been serviced by a "reputable repairman." It is a 1932 Cigar Cutter. It sold for $2,700. With this picture we can all assume that when "Servicing" an instrument it is unnecessary to remove verdigris from old bloated pads that do not seal correctly. The picture below shows the low D tone hole on the same horn. Look at the back of the tone hole. It has old, caked up debris, saliva, and grime on it. This illustrates the lack of attention to detail. It tells us that when "Servicing" a horn it is unnecessary to disassemble it to clean the bore and the tone holes of said caked up debris, saliva, and grime. We also know that it is unnecessary to change the old congealed oil in the hinge tubes - Look at the hinge tubes in the back left. See that grime? This horn was "Fully Serviced By A Reputable Repairman." And it was totally unplayable.
Picture
Unless you see some excellent close ups of the pad work, and reference to a website naming the tech that did the work who will proudly stand behind their services, either don't buy it, or ignore all descriptions of the condition of the horn and assume it will need a Full Mechanical Overhaul starting at $1600.

Here is a link to a Selmer Triple S Super I sold. It has good close ups of the pad work and when I had it listed on ebay or Facebook I included links to my website so people could see even more pictures of the horn there. Any listing should have such details as well or it is suspect.


1 Comment

May 04th, 2015

4/5/2015

0 Comments

 
                                                               What's In A PlayTest?
There is a lot more to playtests than these three examples alone. But I feature these three elements because they are heard so rarely. Too often I hear clips intended to impress upon me the ease of playability of a given horn, and I hear lots of ripping bebop lines and blues rock altissimo phrases. These do not put the horn under the kind of scrutiny essential to demonstrating the ease of playability. They do a great job of showcasing the players ability to burn changes and riff. If music is to be featured in a playtest, Bach's Cello Suites would be a better common denominator. They are a demanding workout that all players use, and will readily reveal playability issues. This playtest here is purely clinical. It does not tell you what kind of music I like to play because that is irrelevant. For those of you that do not appreciate this clinical approach, I will be posting another playtest like this one on Tenor, a '22 New Wonder I, in it I will play some of the Cello Suites. For now we can start with this clinical scrutiny.
Picture
0 Comments

April 15th, 2015

15/4/2015

1 Comment

 
  Here is a compression test on a '47 10M. The horn should sound like a drum. It is an indication of the compression your horn has. It is not a critical leak test of high scrutiny. It is simply a bonus you get after doing all the critical mechanical tests. Certainly all repair techs, and saxophonists do this, but I have to credit my friend Matt Stohrer with the original posting of this test. Thanks Matt.
1 Comment

April 04th, 2015

4/4/2015

0 Comments

 
                            Original Buescher Snap-Ins vs Oversized Domed Resonators
   Here we have a 1925 Gold Plated Tru Tone and a 1926 Silver Plated Tru-Tone. The gold horn was done with all original Buescher Snap-Ins. The silver horn had lost many of them so I just removed the rest.
   For many, the removal of the original snaps not only makes the horn worthless, but is sacrilege itself.
Early in my woodwind repair career here in Seattle, I thought little of the intact originality of the horn. I now feel pretty strongly about keeping all Bueschers original when possible. But I'm not such a purist that I either turn my nose up at a modernized Buescher, or hesitate at the completion of a previous, partial removal of some Buescher Snaps. I do not believe it is cost effective to reinstall lost snaps as the spuds are nearly impossible to find.
  
It was very interesting to A/B these two closely related horns. I suspected the gold horn would have a significantly darker tone; the general consensus being that oversized resos will brighten a horn.
     But the tone of a horn is dictated much more by the mouthpiece used. While the oversized resos will increase projection and quicken the response, I found both these horns to be surprisingly powerful. And the gold plated horn, with the original Snap-Ins was neither overly dark, nor lacked power. Which did I prefer?
I don't know. As usual, after the completion of the Full Mechanical Overhaul I coveted both of them.
0 Comments

April 01st, 2015

1/4/2015

2 Comments

 
2 Comments

March 25th, 2015

25/3/2015

0 Comments

 
My last post, regarding Selmer's removeable bell and the various methods of its sealing, received no shortage of polarized opinions. It got me thinking about my own methods of sealing this design.
   Well, this is the horn in question, a '69 Mark VI Alto, all finished. Take a look. And, here is an open invitation for all of those with an opinion on the topic to come play test this horn, and with said play test alone, determine the method I used. 
   You can see the whole slide show here.
0 Comments

March 20th, 2015

20/3/2015

0 Comments

 
  When I overhaul horns with braced bows I always remove the bow, clean it, and reassemble with a silicone sealant. The bow on this '69 Mark VI looked like this when I removed it; super clean. There was no sealant on this bow. I suppose this is a polarizing topic. I fall on the side of, "Seal it with more than just its two little brass screws."
0 Comments
<<Previous
Forward>>

    Archives

    January 2019
    December 2018
    November 2018
    August 2018
    June 2018
    May 2018
    April 2018
    February 2018
    December 2017
    September 2017
    June 2017
    May 2017
    March 2017
    February 2017
    December 2016
    November 2016
    October 2016
    September 2016
    August 2016
    July 2016
    June 2016
    May 2016
    March 2016
    February 2016
    November 2015
    September 2015
    August 2015
    May 2015
    April 2015
    March 2015
    February 2012

    Author

    Carlo Cennamo

    Categories

    All