Cennamo Woodwinds
  • Home
  • About
  • Services
  • Rates
  • Reviews
  • Gallery
  • For Sale
  • Blog
  • Contact Us
  • Pad Work
  • 1933 Selmer Super
  • '55 SML Rev D Tenor
  • SML Five Star
  • 1940 Conn 30M Connqueror
  • '46 Gold Plated King Super 20
  • '37 Martin Committee I Tenor
  • Repads
  • Overhauls
  • Full Mechanical Rebuilds
  • Gold 30M Al Epstein Horn Loved Hard
  • 1935 Conn 10M For Sale

August 25th, 2015

25/8/2015

0 Comments

 
Hinge Tube Extensions? Isn't All That Work Unnecessary?
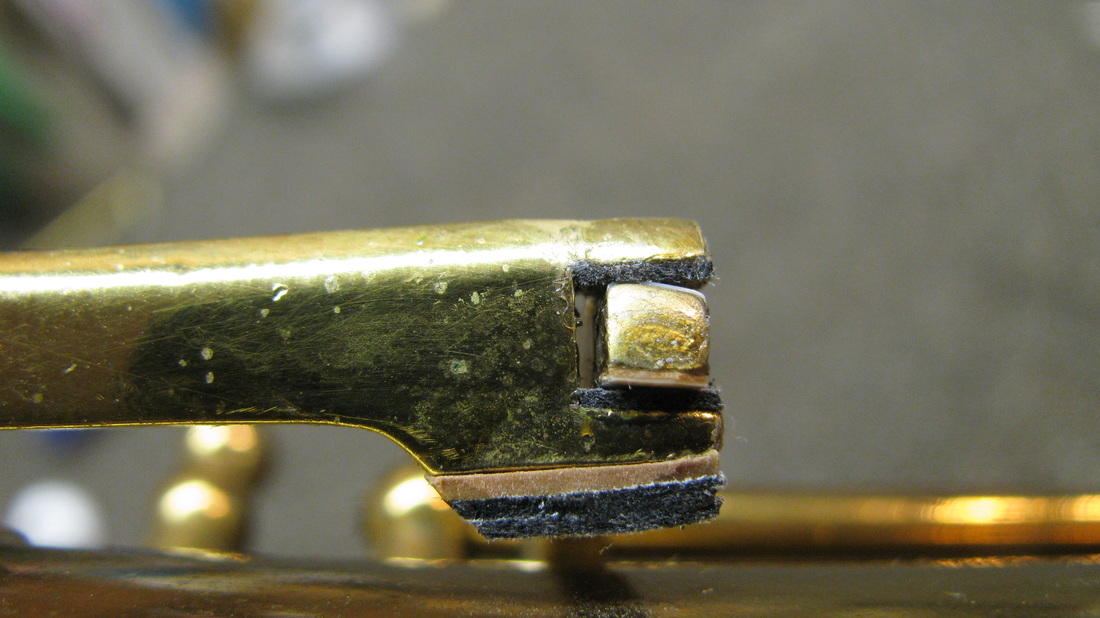
The short answer is No. Here you see a 1941 Conn 10M owned by a client from Los Angeles. The Octave key is sitting between its posts. Look at the gap. It's not small by any means. It's huge. The key is wobbling like crazy on the hinge rod and will wander between the posts. This will give the octave pad multiple seats and ultimately end up in the key dragging against the guide. True, the key will err to one side over the other, but is that how you like you key work? More or less in one position when its not in some other?
     "Sounds good to me. I prefer there to be over lapping seats in my pads. And come to think of it, I like all that clicking and clacking too, so keep those keys loose", said No One, Ever.
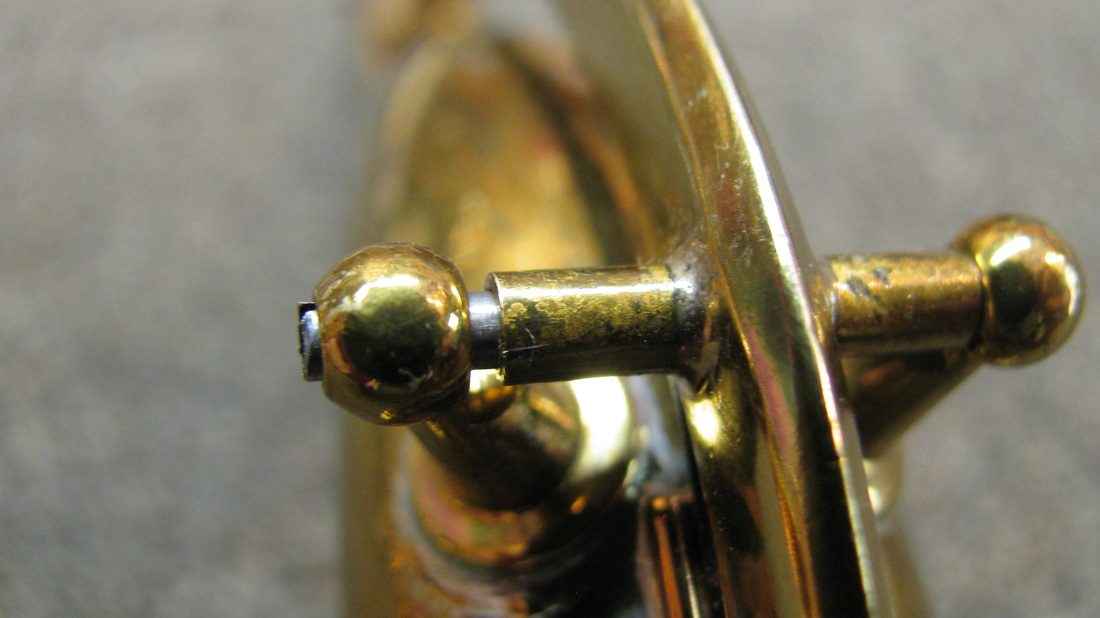
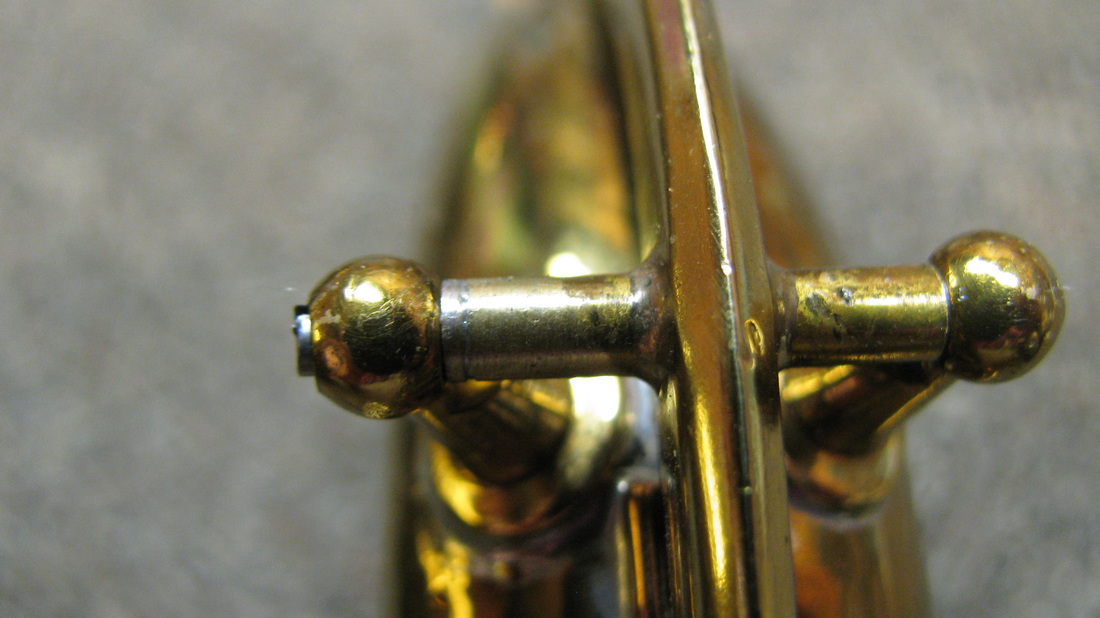
      The gap here is so large it can not be corrected with normal key fitting, nor is it wise to simply bend the posts in towards each other. Doing so might give the appearance of a good fit, but the posts will be angled inwards causing the key to drag. When the whole Octave assembly doesn't feel heavy, sluggish, and unresponsive, it'll fail intermittently. And considering the distance needed to be covered, angling them will probably put dents under the posts as well.
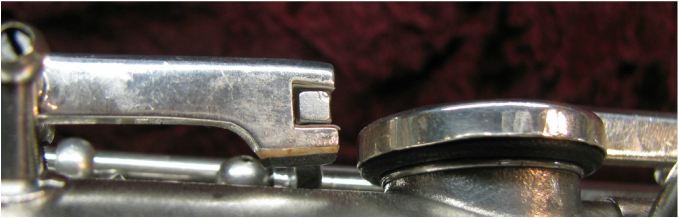
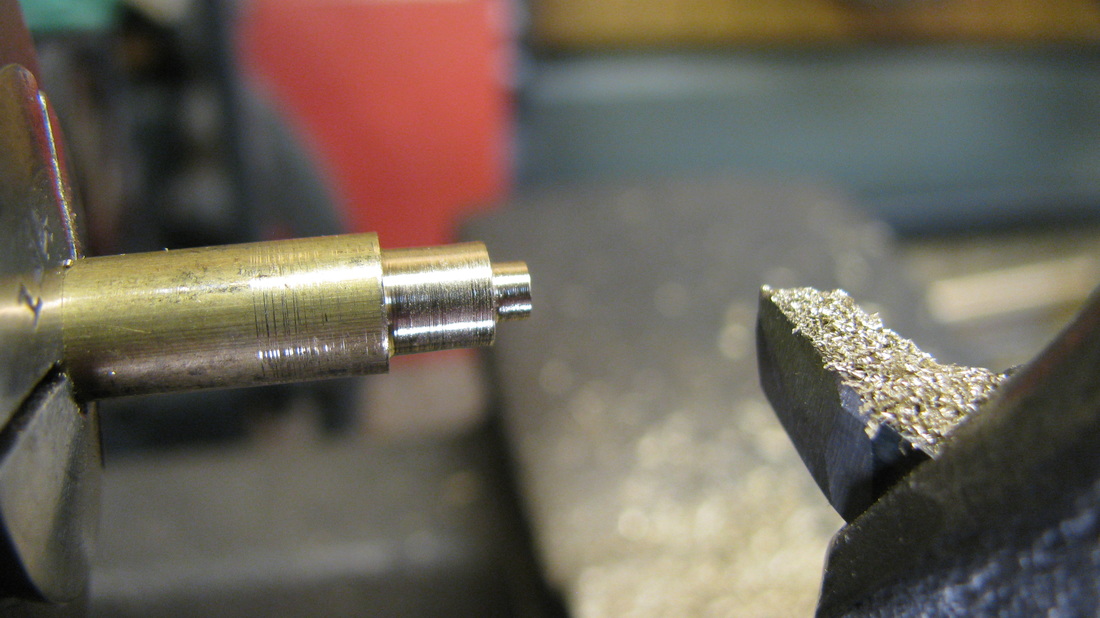
    That is why hinge tube extensions are necessary. They are not overkill. Making this bushing, soldering it onto the hinge tube, and fitting the key so the faces of both the hinge tube and the posts are square, allows the key to stroke positively. Now there is absolutely no concentric play on the hinge rod, end play between the posts, or slop within the hinge rod and its post.
     It is a repair that will last for years, and that is how I do things in my saxophone repair shop here in Seattle. It takes longer and costs more, but unlike the above mentioned alternatives, it eliminates frequent visits to the shop. And frequent visits to the shop are what is really unnecessary.
0 Comments

August 20th, 2015

20/8/2015

0 Comments

 
                                                  The Little Stuff Makes A Big Difference
       This 1941 Conn 10M is in my woodwind repair shop in Seattle. The previous repair tech crunched the tabs on both the side Bb and C keys. Why? To eliminate lost motion between the the lever and the key. Lost motion is when a lever or key designed to open or close another key does not do so instantaneously: The keys should act as one.
     When there is lost motion they feel clumsy, clunky, and reduce the players confidence in their horn. If the adjustment materials are too thick, or create unnecessary friction, the key will bind. If the adjustment materials are too hard, the key work will make annoying clicking sounds. If the materials are the correct thickness, act as good bearing surfaces, and are soft enough to absorb sound, the key work will act as one, feel slick and responsive, and be silent.
       Here is a short chronology: Lost motion is usually the first indication that your adjustment materials have compressed and worn down over time. Your horn will often play adequately even if there is lost motion. It will just feel clunky, but when the discrepancies increase, playability issues will surface, and that's when you end up in the repair shop.
     So, how to get rid of it? You could do what was done in these photos. Just crunch those tabs to make up for the worn out adjustment material and send the musician on their way. This could result in:
-Obviously unparallel key tabs which are ugly as hell and look like someone didn't care enough to do the job right.
-Compressed height adjustment material under your Bb key. Which is unsightly and will increase the key stroke, producing a sharper Bb. It will also make the key bind before it bottoms out on the body tube.
 -Plier marks on your Bb key.
     Look at the two pictures above. The angled tab on the Bb key even wore down the lever. It has a taper on its south side. Compare it with the picture below: That is a 1947 10M. See the corners on that lever? That is how it should look.
Picture
      Setting the adjustment materials so they eliminate all lost motion and silence all the key work is time consuming. When I worked in a corporate repair shop, taking the time to do it the way I have done here is exactly the kind of thing that would have resulted in a Repair Department Meeting in which we would all be pressed to get work done faster. This is why repair techs do what was done in the first photo. They are either pressed to do so, or they have been trained to do so and don't know any better.
    Of course, sometimes, the client has made their inability to pay for a proper repair clear and has been told explicitly by the repair tech that corners will be cut. But that topic requires a lengthy article all to itself.
0 Comments

August 11th, 2015

12/8/2015

1 Comment

 
                                                    1941 Conn 10M. Factory Relacquer?
When I see Res-O-Pads such as these, they say, "Original pads" to me. As in, these were the only pads put in this horn. But the bell has that relacquered look to it. Not so much in the engraving, but particularly in what looks like hammer marks near the bell-to-bow ferrule.
So, if it is a relacquer, at what point in this horns life, starting in 1941, did someone decide, or get persuaded, to have it relacquered at the factory? Ten years, in 1951? Eighteen, in 1959 right before they busted the union? I would love to go back in time and hear the sales person at the music store, or the repair tech in their shop, discuss the advantages of having this done.
1 Comment

August 06th, 2015

6/8/2015

0 Comments

 
Picture
                                        G# Pad Embedded with Polytetrafluoroethylene Powder
Doing saxophone repair in my Seattle shop for several years, I've been trying this out for sometime now and have not yet seen any horns come back. So, while the verdict is still out on the effectiveness of this, I like the theory enough to continue doing it. That the horns have not yet come back is, perhaps, confirmation that it's providing relief from sticking G# and C# pads.
Polytetrafluoroethylene is just the chemists name for Teflon. Rubbing the powder into the grain before ironing and seating the pad gives the result you see in the photo.
0 Comments

    Archives

    January 2019
    December 2018
    November 2018
    August 2018
    June 2018
    May 2018
    April 2018
    February 2018
    December 2017
    September 2017
    June 2017
    May 2017
    March 2017
    February 2017
    December 2016
    November 2016
    October 2016
    September 2016
    August 2016
    July 2016
    June 2016
    May 2016
    March 2016
    February 2016
    November 2015
    September 2015
    August 2015
    May 2015
    April 2015
    March 2015
    February 2012

    Author

    Carlo Cennamo

    Categories

    All

Powered by Create your own unique website with customizable templates.